What began as a bombing mission to destroy an enemy bridge turned into a story of heroic bravery and incredible odds for young Lt. Owen J. Baggett on March 31, 1943.
Disaster Strikes and a Hero is Born
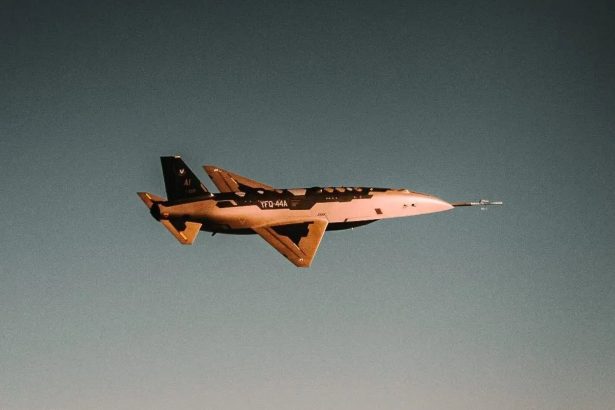
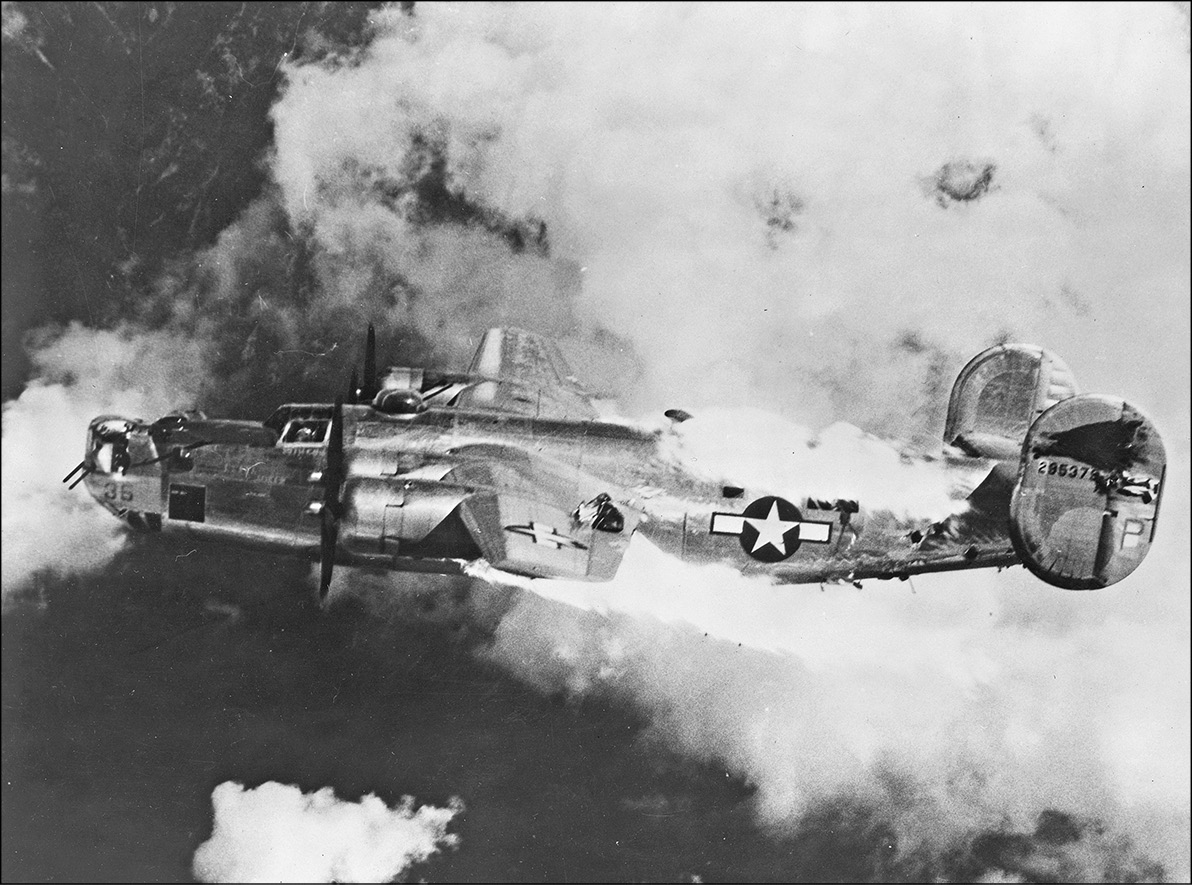
Fuel tanks burned and oxygen tanks exploded as the attacks continued and 2nd Lt. Owen John Baggett left his co-pilot’s seat of his Consolidated B-24 Liberator bomber and moved past nineteen year-old Sgt. Samuel Crostic standing on the catwalk over the open bomb bay. Crostic had left his top gun turret position to man fire extinguishers in an attempt to save the burning aircraft. Baggett manned the turret fighting off the enemy fighter planes until Crostic ran the fire extinguishers dry.
The B-24 to their left was piloted by Col. Conrad Necrason, the leader of the formation and commander of the 7th Bomb Group. The colonel was seriously wounded and Baggett’s aircraft, piloted by Lt. Lloyd Jensen, was in serious trouble before even reaching the target, a Japanese railroad bridge at Pyinmana, Burma. The bridge was heavily defended and had two Japanese fighter bases nearby. Some of those fighters had found the American bombers that day, Mar. 31, 1943. Baggett’s four-engine B-24 heavy bomber was assigned to the 10th Air Force, 7th Bomb Group’s 9th Bomb Squadron, based at Pandaveswar in India. The unit normally flew very long missions, often targeting the Japanese in Burma.
- 1 What began as a bombing mission to destroy an enemy bridge turned into a story of heroic bravery and incredible odds for young Lt. Owen J. Baggett on March 31, 1943.
- 1.1 Disaster Strikes and a Hero is Born
- 1.2 What Really Happened
- 1.3 Browning’s Brainchild
- 1.4 The Nakajima Ki-43
- 1.5 Heroes
- 1.6 Side Note
As Baggett’s B-24 filled with flames, smoke, and fumes, Lt. Jensen ordered the crew to bail out. With the intercom system out of action, hand signals had to be used by Baggett to inform the gunners it was time to go. Baggett strapped on his own parachute and floated down from the stricken bomber noting four other open parachutes in the sky from his plane, just before the Liberator exploded.
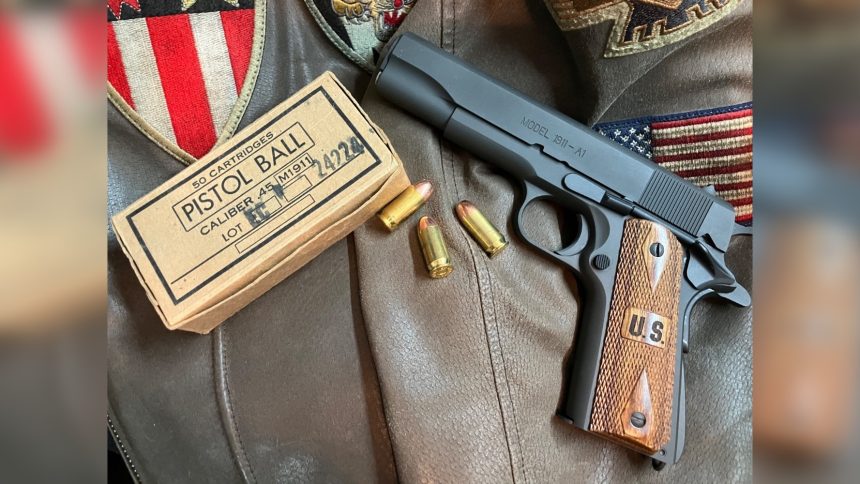
The Japanese 64th Sentai (fighter group) of the Imperial Army Air Force, flying thirteen Nakajima Ki-43 Hayabusa fighters, began attacking the surviving crew members dangling in their parachutes, killing two. Baggett, wounded in the arm, intentionally went limp in his harness and drew his issued sidearm, a model 1911-A1 .45 caliber semi-auto pistol, nestled it close to his leg and hoped the Japanese pilots would take him for dead. As Baggett drifted down, a Ki-43 approached him, slowed to almost stall speed, and the pilot, hoping to get a better look to determine Baggett’s state, opened his canopy.
Baggett seized the moment and brought his sidearm to bear on the Japanese pilot, rapidly firing 4 shots towards the open cockpit and its pilot. The plane then stalled and spun into the ground. 2nd Lt. Baggett had made an incredible shot either hitting a moving pilot or damaging a moving aircraft while drifting down in a parachute with nothing more than a sidearm designed mainly for close quarter defense against human targets.
What Really Happened
Japanese air reports of the event that day record no loses. This however could be dismissed as the misinformation of war, as it was common to under-report loses and over-report victories. Other stories indicate the Japanese pilot crash-landed after the incident and out of disgrace, shot himself. The account crediting Baggett with striking the Japanese pilot seems to have more substance behind it than other ideas of what might have happened that day, as the story was confirmed by Col. Harry Melton, commander of the 311th Bombardment Group (Dive).
Baggett was now a POW (Prisoner of War) after being captured by the Burmese and turned over to the Japanese, as well was Col. Harry Melton, after being shot down in November 1943. Melton was passed through the same POW camp as Baggett and relayed the story a Japanese Col. had told him about the pilot in question being thrown from the wreckage upon impact and found with a bullet in his head. Col. Melton had the intent of making an official report of Baggett’s actions that day, but lost his life when the ship moving him and other POWs was torpedoed and sunk on the way to Japan by the submarine U.S.S. Sealion. Melton, a survivor in a lifeboat for two days, along with the other survivors, was machine gunned by a Japanese destroyer.
Some accounts state, while flying escort that day, Melton actually witnessed Baggett shooting the Japanese pilot and saw the Japanese plane crash. However, Melton was assigned to a dive bombing group flying North American A-36 Apaches at the time, and only later P-51A Mustangs. Other facts that seem to back up Baggett’s claim are that if the Japanese plane had simply stalled, the plane was at a high enough altitude (4,000-5,000 ft) that the pilot had ample time to attempt to correct it. There were also no reports of Allied fighters in the area that day that could have downed the aircraft. Baggett had been treated as a celebrity by his captors as well, indicating they respected his actions that day.
Baggett, Jensen, and Crostic all survived the bailout and were taken as POW’s. Baggett, along with Jensen, was taken to Singapore and imprisoned for over two years. Baggett had lost half his body weight during his imprisonment, dropping to a mere 90 lb from 180 lb. Baggett had not been fully convinced that he actually did down that fighter that day, but upon rescue along with 37 other POWs by eight OSS (Office of Strategic Services) agents on Sept. 21, 1945, Baggett learned that he was famous for being the only person in World War II to shoot down a plane with a pistol.
Browning’s Brainchild
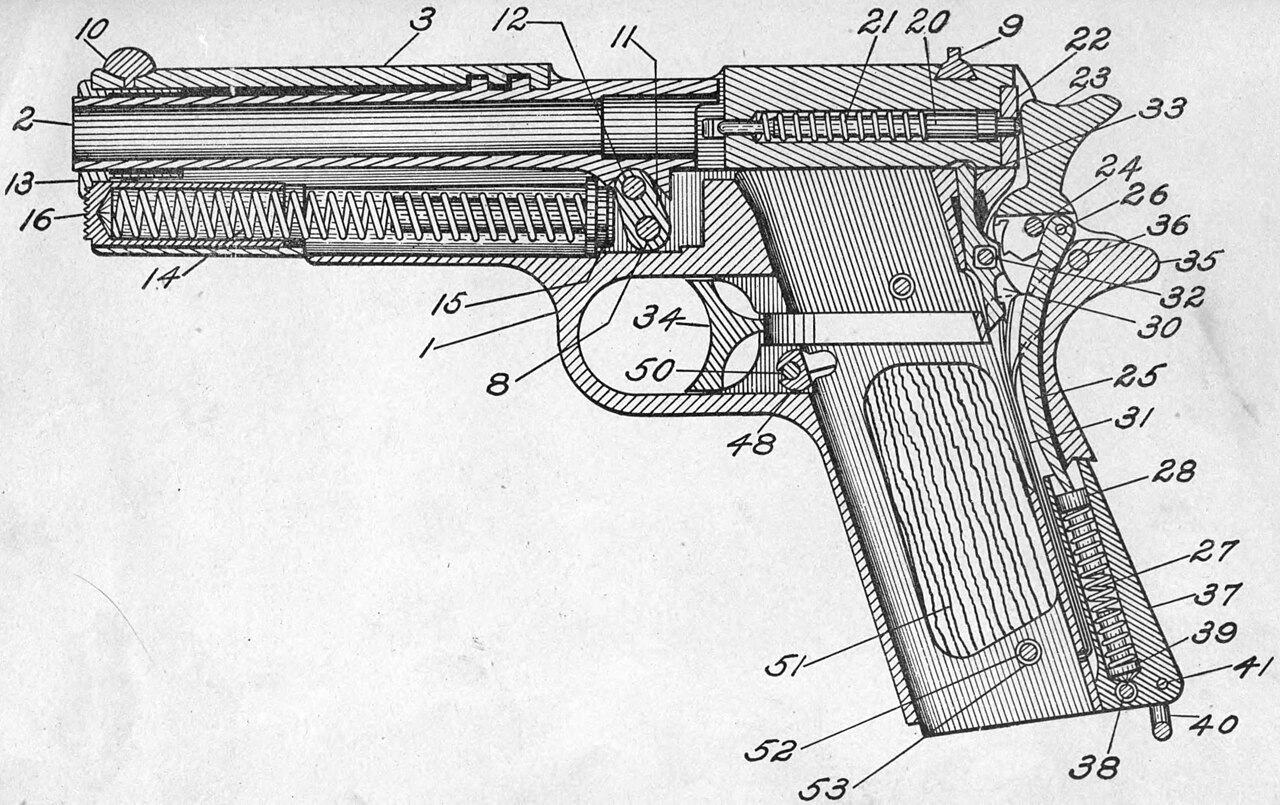
One of the most well-known and reliable military sidearm designs dating back to over a century old, the Model 1911-A1 was designed by renown firearm designer John Moses Browning. In 1905 the United States Army concluded nothing smaller than .45 caliber was suitable for a military sidearm. Browning had been working on a design for a semi-auto pistol, and in 1907 a .45 caliber pistol competed in the United States Government Trial. The lack of effect of recent .38 caliber revolvers prompted the Chief of Ordinance to lay down the rule that any entrant weapon must fire the .45 caliber 230 grain bullet of the round developed in 1906 by Colt and Browning.
Nine different pistols were tested, with 200 examples being ordered of a model from Savage Arms, and 200 of Browning’s design ordered from Colt. The pistols were troop-tested and Colt was announced as the winner on the condition a couple minor adjustments would be made by Browning to his design, and the sidearm was accepted in 1911. The hammer spur was made longer during World War I, and other changes to the grip, safety, and trigger gave us the M1911-A1 in 1926.
The M1911 is a semi-automatic pistol in which the barrel and breech lock by grooves on the underside of the slide top engaging ribs on the barrel; the barrel has a link pinned beneath it and the lower end of this link pivots about the slide stop pin. As the slide recoils, it takes the barrel with it, the link held at the foot creates a semi-circular path with the upper end, drawing the breech down and free of the slide. The slide continues to recoil to its limit, re-cocking the hammer, forced to return by a spring and strip a fresh round from the seven round detachable box magazine while the barrel is pushed back forward. Now the link causes the breech to swing upwards and engage the slide once more, locking the pistol for firing.
The 1911 is 8.5 in long, weighs 2 lb 7 ounces unloaded, and has a barrel length of 5 in. The barrel was designed to be easily replaced in a matter of minutes. The gun is single-action, meaning the hammer must be cocked before firing, either manually, by action of racking the slide, or recoil movement of the slide from firing. Famous for being carried “cocked and locked”, the hammer can be cocked with a round in the chamber and the thumb safety engaged to prevent unwanted hammer fall on a live round. The gun also has a grip safety, preventing the pistol from discharging unless the grip is squeezed.
Colt is most well-known for producing the M1911 for military use; however several manufacturers, especially in time of war, have produced the pistol. Those include the Springfield Armory, Remington UMC (Union Metallic Cartridge Company), Union Switch & Signal Company, the Singer Sewing Machine Company, Ithaca Gun Company, and Remington Rand (the typewriter maker). A multitude of companies manufacture a 1911 pistol of some form these days, as the gun remains highly popular for competition shooting, plinking and self-defense.
With a reputation as a highly effective man stopper, the 1911 fires the .45 ACP (Automatic Colt Pistol) cartridge. The standard military loading was a 230 grain FMJ (Full Metal Jacket) bullet moving at an unimpressive velocity of around 830-860 fps (feet per second). However, being of a large diameter, it creates a serious wound, and being a heavy chunk of lead, it generates 405 foot-pounds of energy. It is still respected and regarded as one of the best and most powerful military sidearm rounds.
The Nakajima Ki-43
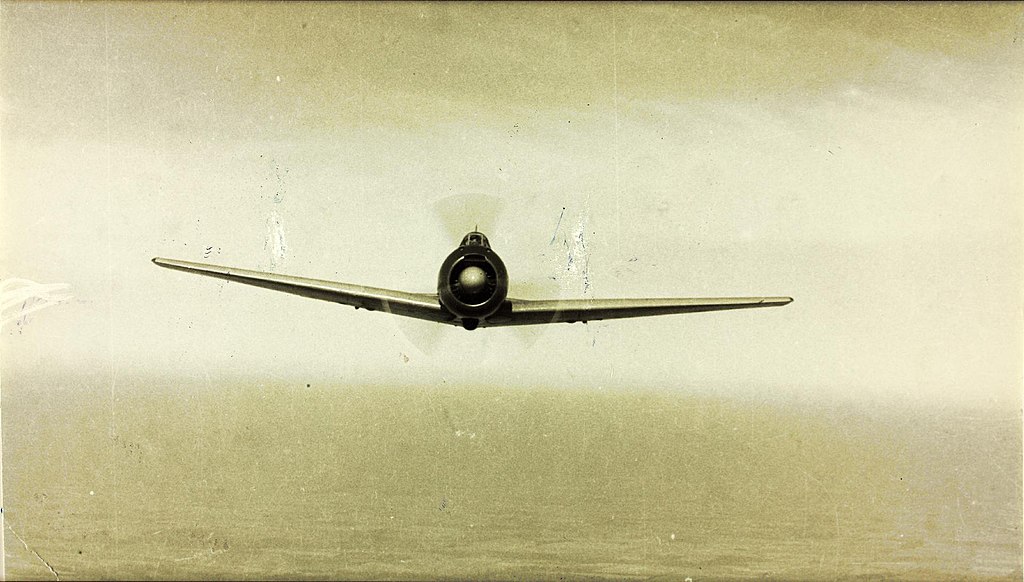
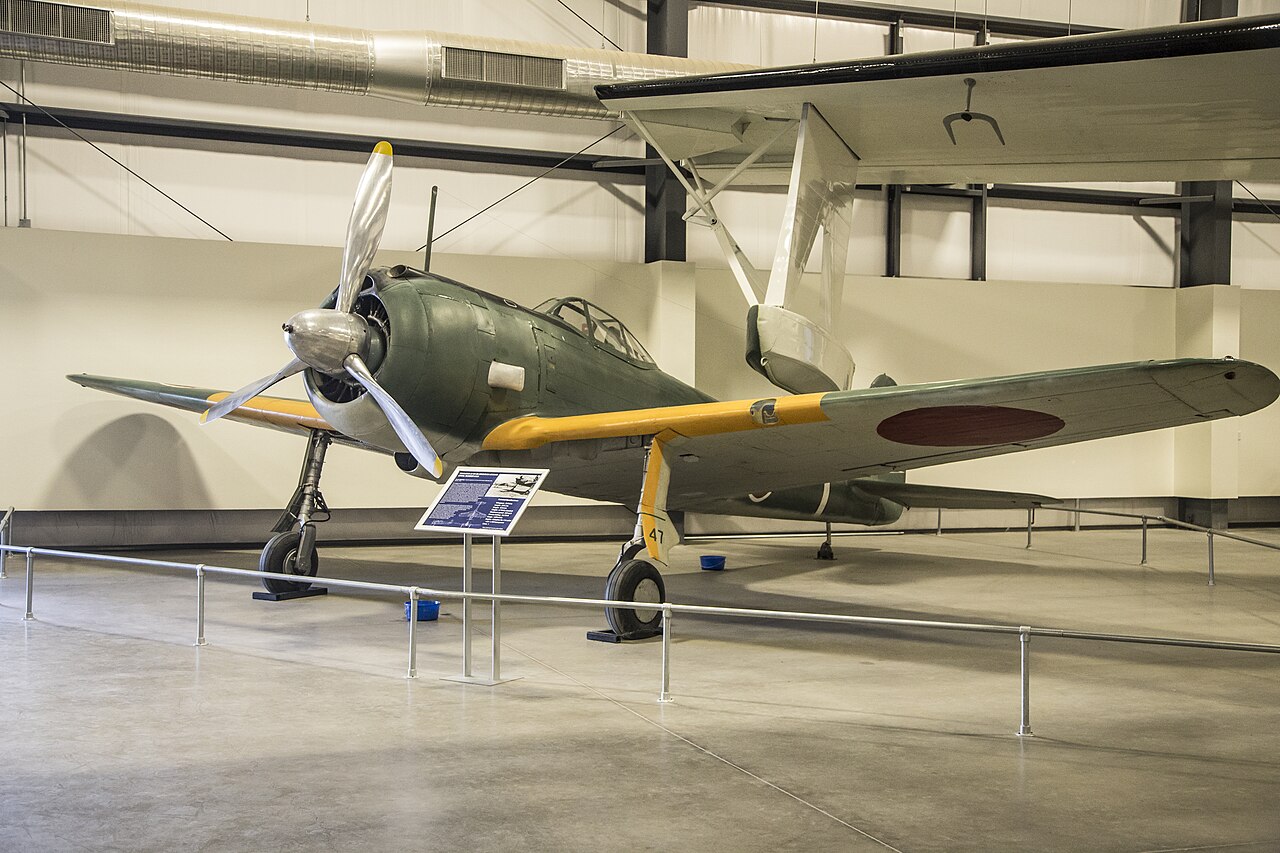
Developed as a successor to the Imperial Japanese Army’s Ki-27 fighter, the Nakajima Ki-43 first took to the air in January 1939. It was a cantilever low-wing monoplane with an enclosed cockpit and retractable landing gear. When the Pacific War began, it was one of the most capable fighters in the theatre. However, as with most fighters during the war, constant refinements were mandated in order to keep pace with the Allies. Known by the Japanese as the Hayabusa (Peregrine Falcon), they were codenamed “Oscar” by the Allies. More examples of the Ki-43 were produced than any other Japanese Army fighter, with a total of 5,919 aircraft.
Records state the 64th Sentai were operating the Ki-43 II variant by February of 1943. This version was powered by a more powerful Nakajima Ha-115 engine with a constant speed three-blade propeller. Capable of reaching a maximum speed of 329 mph, it had a range of close to 2,000 miles. Self-sealing tanks and armor were also added, although it seems some of the aircraft in the Burma theatre may not have had all their armor plates installed at the time of confronting Baggett. Earlier examples proved worthy opponents; however, the lack of fuel and pilot protection had been discovered by Allied pilots.
Armed with twin 12.7 mm (.50 caliber) machine guns and an ability for underwing carriage of two 551 lb bombs, it had increased ground attack capabilities over previous versions. Wingspan and wing area were reduced, a revised canopy added as well as a new reflective gunsight. The Hayabusa served the entire war, in the end defending Tokyo and participating in the kamikaze role.
Heroes
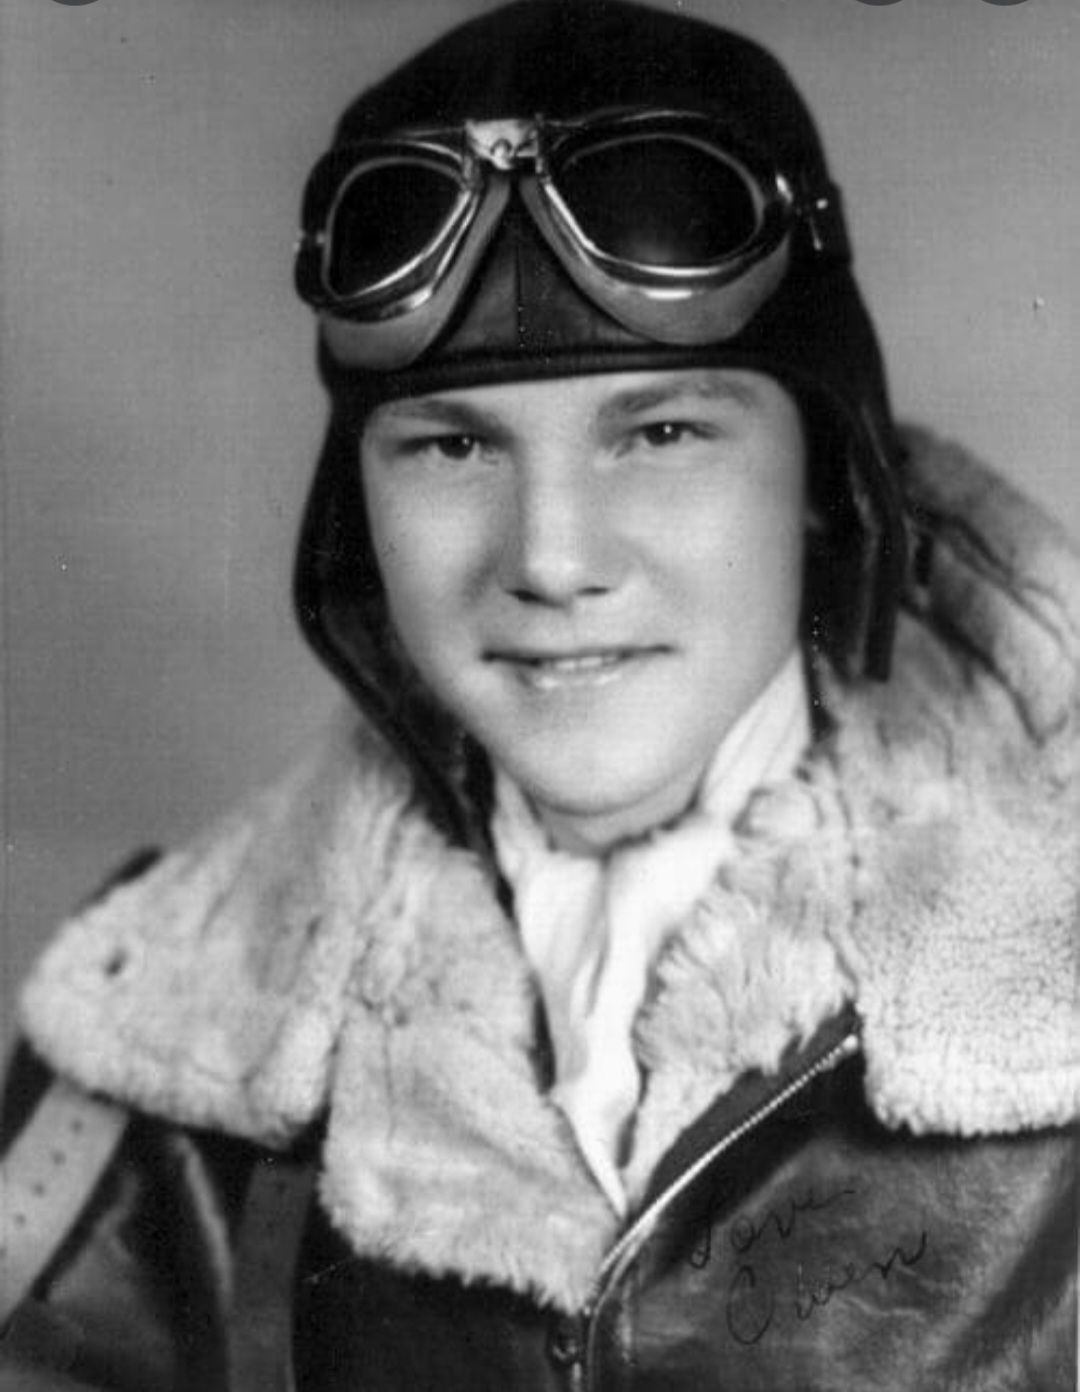
Awarded the POW Medal, Owen John Baggett returned to the service after his rescue, served during the Korean War, and retired with full honors as a Colonel in 1973. Upon leaving the Air Force, he worked as a defense contractor manager, and passed away on July 27, 2006, at his home in New Braunfels, Texas.
Baggett had majored in music theory and composition while attending Abilene High School and Harding Simmons University in Abilene, Texas. After Pearl Harbor was attacked and while he was working in New York for a defense contractor, he volunteered for the service and was trained on the Army Air Force B-24 bomber.
Sgt. Samuel A Crostic was held as a POW until liberated May 1, 1945. He received the Prisoner of War Medal. Lt. Lloyd Jensen was liberated on Oct. 2, 1945 from Malaya POW Camp. Five other crew members were declared dead the day the aircraft went down: Lt. Max A. Davis, 2nd Lt. Bert J. Smith, TSGT Kenneth E. Schleicher, SSGT Stephan F. Burke (died in captivity), and SSGT Joseph R. Mercer. The only other survivor was SSGT Tadix E. Higginbotham, also taken as a POW and liberated on May 2, 1945.
Side Note
As research often does, history is uncovered and stories within stories are often brought to light, some as fascinating as the original research topic. Col. Harry R. Melton was mentioned in the event involving Lt. Baggett, and his fate described. However, there is more to the story that readers may find of interest. It seems a single British officer survived the sinking of the ship carrying the prisoners as well as the strafing of the life boats by the Japanese destroyer. This British officer confirmed Melton’s death to the U.S. War Department. This same officer also wrote Melton’s wife describing her husband’s heroics. In addition to sending that letter, the British officer also included a love letter Melton had written to his wife while in Singapore. The British officer had carried that letter between insole and sole of his shoe up to the end of the war. The letter was still quite legible when Mrs. Melton received it.
Lt. Yohei Hinoki of the 64th Sentai flying a Ki-43 had been the Japanese pilot to shoot down Melton in his P-51A, forcing him to bail out at about 1,000 ft. Upon learning of the details of Melton’s death by being machine gunned down while floating in a life raft, Hinoki was saddened. He composed a letter of sympathy for Melton’s wife, which was eventually delivered to her daughter Kip 30 years later. Melton’s daughter Anne accepted his Distinguished Flying Cross at the age of five; Melton also received the Purple Heart. Hinoki passed away in 1991 of cancer.